Developing Vaadin JEE6 applications on Eclipse and Apache TomEE
Recently the first stable version of Apache TomEE 1.0 was released into the wild. For those who don't know Apache TomEE builds upon Apache Tomcat 7 adding JEE6 on to the stack making it an easy to setup and use application server.
In this short tutorial I'm going to show you how can start developing on Eclipse using the latest Apache TomEE application server.
Installing TomEE and configuring Eclipse WTP
To install Apache TomEE head to http://openejb.apache.org/downloads.html and grab the latest release (At the time of writing 1.0.0) and unzip the package somewhere. I am going to refer to that directory as TOMEE_INSTALL_DIR.
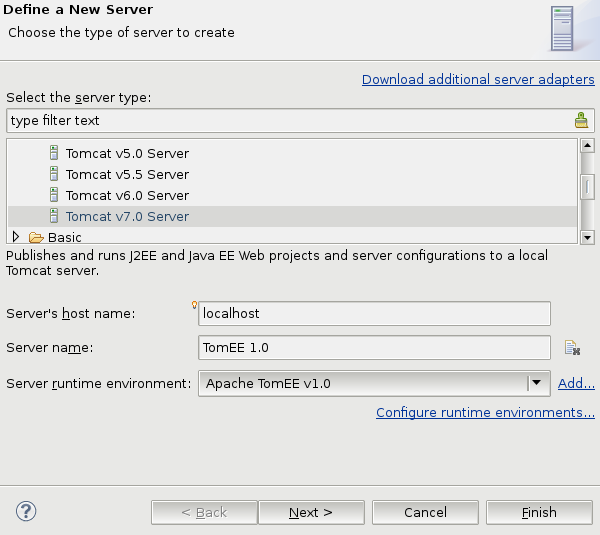
Next, open up eclipse. In the JavaEE perspective, go to the Server window and right click and select New->Server
Currently there does not exist any TomEE connector but since TomEE is based on Apache Tomcat 7 we are going to use that connector instead. So go ahead and select Tomcat v7.0 Server from the server type list but do not close the dialog yet!
Next, we need to create a new Server Runtime Environment for the application server. Select the Add.. link right of the Server Runtime Environment select box and it should open up the following dialog.
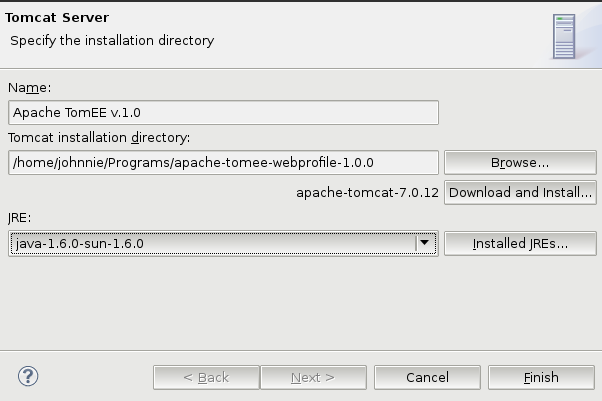
I have already filled in the details above. The important things are giving the server a name (in my case Apache TomEE v.1.0) and pointing the Tomcat installation directory to TOMEE_INSTALL_DIR.
Now select Finish and you should be returned to the New Server dialog.
Select the newly created Server runtime environment (Apache TomEE v.1.0) and select Finish again.
You now should have a ready made Apache TomEE server for your projects. Now lets create a Vaadin project to run on the server.
Running a Vaadin JEE6 application on TomEE
Lets use the Vaadin Project Wizard to create the project.
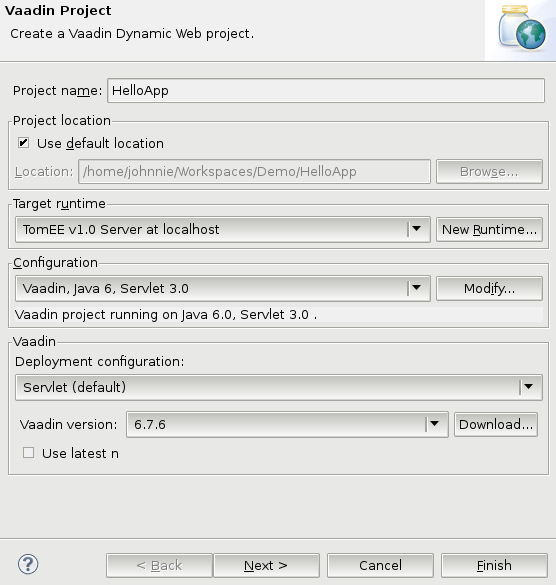
So select File->New->Vaadin Project and start by giving your project a name, in my case I am going to name it HelloApp
Next, in the Target Runtime select box select our newly created TomEE server (Apache TomEE v.1.0). You should also select the Configuration to be "Vaadin, Java 6, Servlet 3.0". The Vaadin version is optional, I am going to use Vaadin 6.7.6 for this demo.
Here is now the resulting dialog looks like:
Now select Finish and the project should be created for you.
The first thing you should do is remove the web.xml file from the project. We will not need it since we are going to configure the servlet using annotations instead.
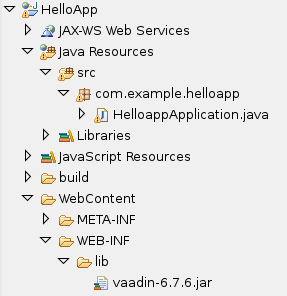
The project structure should look like this after the project is created:
Now, open up HelloappApplication.java and change it to look like this:
package com.example.helloapp;
import javax.enterprise.context.SessionScoped;
import com.vaadin.Application;
import com.vaadin.ui.*;

@SessionScoped
public class HelloappApplication extends Application {
    @Override
    public void init() {
        Window mainWindow = new Window("Helloapp Application");
        Label label = new Label("Hello Vaadin user");
        mainWindow.addComponent(label);
        setMainWindow(mainWindow);
    }
}
The only thing I've added is the @SessionScoped annotation.
Next, lets create a servlet to serve our application, create a new java class under the same package as the HelloappApplication with the name HelloappServlet.java with the content:
package com.example.helloapp;
import javax.inject.Inject;
import javax.servlet.ServletException;
import javax.servlet.annotation.WebServlet;
import javax.servlet.http.HttpServletRequest;
import com.vaadin.Application;
import com.vaadin.terminal.gwt.server.AbstractApplicationServlet;

@WebServlet("/*")
public class HelloappServlet extends AbstractApplicationServlet {

    @Inject
    HelloappApplication application;

    @Override
    protected Application getNewApplication(HttpServletRequest request)
            throws ServletException {
        return application;
    }

    @Override
    protected Class<? extends Application> getApplicationClass()
            throws ClassNotFoundException {
        return HelloappApplication.class;
    }
}
What we are doing here is creating a new servlet and injecting the application into the servlet.
Finally we will need to add an empty beans.xml file into WebContent/WEB-INF. Here is the contents of that file:
<?xml version="1.0" encoding="UTF-8"?>
<beans xmlns="http://java.sun.com/xml/ns/javaee" xmlns:xsi="http://www.w3.org/2001/XMLSchema-instance" xsi:schemaLocation="http://java.sun.com/xml/ns/javaee http://java.sun.com/xml/ns/javaee/beans_1_0.xsd">
</beans>
And we are done. Now add the application to the TomEE server by right clicking on the server and selecting Add and Remove... and add the Project.
Now we are ready to start the server, so hit the Start button on the server and after the server has started point your browser to http://localhost:8080/HelloApp and you should see the application running happily on Apache TomEE.
That's all folks, happy JEE6 coding :)